ADD THE SLIDER CODE HERE

Search...

22.8.13

Mr. Lentz


"A MODERN COWBOY OF THE CREATIVE REVOLUTION" (Un vaquero moderno de la revolución moderna) es el slogan de Mr. Lentz. La combinación un tanto extraña de un cowboy y este tipo de productos resulta una mezcla perfecta. Lo rudo y lo cursi se mezclan, creando accesorios bonitos y durables. Sus accesorios son elaborados con madera y musgo natural. Además cada pieza es elaborada a mano... por un cowboy!!

"A MODERN COWBOY OF THE CREATIVE REVOLUTION" is the slogan of Mr. Lentz. The strange combination of a cowboy and this type of product is a perfect mix. The rude and cheesy are mixed, creating beautiful and durable accessories. The accessories are made ​​with wood and natural moss. In addition each piece is handmade by ... a cowboy!!

Enjoy
Hola Ático

1.8.13

DIY hairstyles


El día de hoy les traemos algunas ideas para peinados, son súper sencillos y el resultado mejora cualquier look, ya sea para una salida nocturna o las actividades diarias. Las ilustraciones son elaboradas por Samantha Hahn. Para mas información visiten la página www.sheletsherhairdown.com.

Today we bring you some ideas for hairstyles are super easy and the result enhances any look, whether for a night out or daily activities. The illustrations are made by Samantha Hahn. For more information visit the website www.sheletsherhairdown.com.

Enjoy
Hola Ático

22.7.13

DIY Tire Planter


Para todos los que quieren comenzar a reciclar este proyecto es perfecto. Además de ayudar al medio ambiente el resultado final es perfecto para decorar cualquier ambiente.

Materiales:
-Un neumático o llanta usada
-Spray del color de tu preferencia
-Tierra para macetas
-Flores o plantas
-Cacahuates para embalaje y tela para jardín
Opcional: Si quieres colgar la llanta consigue cadena y un gancho en forma de S.

Paso 1: Lava la llanta perfectamente con agua y jabón, espera a que seque completamente.  Aplica una capa de pintura, en este caso se utilizo pintura+primer 2 en 1, si no la consigues pinta primero una capa de primer blanco y después la de color para que quede un color mas potente y con mejor terminado. Aplica las capas de pintura necesarias y recuerda dejar secar entre cada capa.

Paso 2: Ya que esta completamente seca la pintura, utiliza un taladro para realizar seis perforaciones en la parte inferior, esto servirá para que el agua drene y el agua no se estanque.

Paso 3: Coloca la tela para jardín y los cacahuates de embalaje en la parte donde hiciste los seis agujeros. Ahora la parte divertida, toma las diferentes plantas o flores y colócalas dentro, recuerda que puedes combinar diferentes colores y texturas. Cubre con tierra y riega, es el momento para comprobar que el agua drena por los orificios.

Paso 4: Por último te damos dos opciones para tu nueva maceta. La primera es colgarle sobre la pared utilizando una alcayata. Otra es colgarla de un árbol, utiliza una cadena de metal para sujétala a la rama del árbol, con ayuda del gancho en forma de S sujeta ambos extremos de la cadena y LISTO!!. Una manera muy sencilla de darle un nuevo look a una llanta vieja y reciclarla.

For all who want to start upcycling this project is perfect. Besides helping the environment the result is great for decorating any room.
 

Materials:
-An old tire
-Color Spray of your choice
-Potting Soil
-Flowers and plants
-
Packing Peanuts and landscape fabric
Optional: If you want to hang the tire get some chain and S-hook

Step 1: Wash the tire well with soap and water, wait for it to dry completely. Apply a coat of paint, in this case they use paint + primer 2 in 1, if you don´t get it, apply a layer of white primer and then the color you choose, this will help you to get more powerful color and better finished. Apply as many coats you need and remember to dry between coats.

Step 2: Wait until the paint is completely dry, then use a drill to make six holes in the bottom, this will help the water to drain.

Step 3: Place the landscape fabric and packing peanuts on the part where you made the six holes. Now the fun part, take the different plants or flowers and place them inside, remember that you can combine different colors and textures. Cover with soil and water, it's time to check that the water drains through the holes.

Step 4: Finally we give you two options for your new pot. The first is to hang it on the wall using a spike. Another option is hanging from a tree, use a metal chain to hold it to the branch of the tree, and using the S-hook hold both ends of the chain and READY!!. A simple way to give a new look to an old tire.


Enjoy
Hola Ático

28.2.13

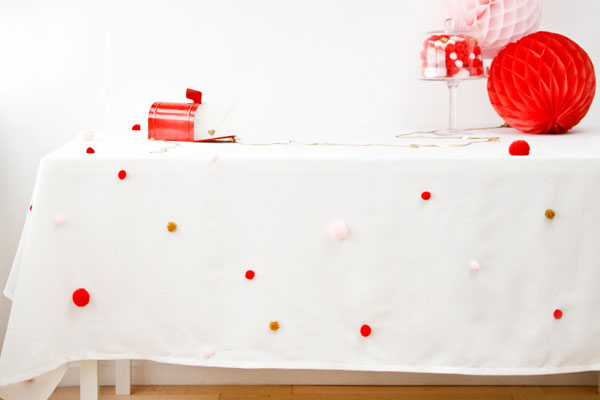
DIY POM POM TABLECLOTH

Materiales:
- Mantel
-Pompones
-Pistola de pegamento caliente

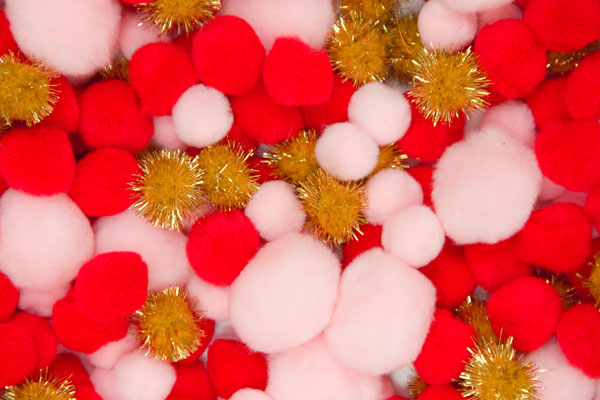
Paso 1: Escoge tus pompones de diferentes colores y tamaños. Puedes poner el mantel sobre la mesa y marcar donde quieres colocar los pompones (Puedes hacerlo con ayuda de unos cuantos alfileres). Si  planeas comer sobre mantel, no coloques pompones en la parte superior o donde se interpongan en el camino! Pero si lo vas a utilizar para una barra de postres u otra cosa, tienes un poco más de espacio para jugar!
Paso 2: Pega los pompones. Al pegar los pompones, levanta ligeramente el mantel de la mesa para que el pegamento no se pegue sobre todo si la tela es delgada! A menos que quieras un pompon sobre la mesa! Pega todos los pompones hasta que estés satisfecho con la forma en que se ven.

Supplies:
-Tablecloth
-Pom poms
-Hot glue gun

Step 1: Pick out your pom pom colors and sizes. You may want to lay your tablecloth on your table and mark the parameters you want to add the poms to (You can do this with a few pins). If you are planning to eat on the tablecloth, you don’t want pom poms on top or they will get in the way! If you’re using it for a dessert bar or other display, you have a little more room to play with!
Step 2: When you adhere the pom poms, slightly lift the tablecloth off the ground so the glue doesn’t stick to the floor if you fabric is thin! Unless you want a pom pom-ed floor, too!? Keep adding pom poms until you’re happy with how it looks.

Enjoy!!
Hola Ático
25.2.13

DIY Confetti!


La idea es bastante simple. Tu puedes llenar un tubo con papel picado y cuando esté listo, quitas la tapa  y lanzas el confeti. El movimiento de tu brazo impulsa todos los confetis por el aire. Claro, puedes comprar confeti ya hecho pero sólo toma un poco de tiempo hacerlo y puedes personalizar con los colores de tu evento. Al final son tan padres que es super fácil incorporarlos la decoración de tu fiesta o  boda.

Materiales necesarios:
Papel de china
Tubos de plástico
Tijeras

Paso 1: Para hacer el confeti, corta tiras de papel sobre el pliego de papel de china y luego corta las tiras para hacer pequeños confetis cuadrados. Asegúrate de que el tamaño del papel picado sea lo suficientemente pequeño para caber en los tubos.
Paso 2: Coloca el confeti en los tubos transparentes y coloca la tapa para que estén listos para tus invitados.

*Puedes agregar calcomonias y otras cosas para adornar los tubos.


The idea is pretty simple. You fill up a tube with confetti and when you are ready to throw the confetti you take off the lid and throw the confetti. The motion of your arm propels all the little confettis into the air. Of course you could buy confetti pre-made but our pretty confetti only took a little time to make and you can custom tailor the colors to your event. These look so nice when they are done that they are easy to incorporate into your party or wedding decor. 


Materials Needed: 
Tissue Paper
Plastic Tubes
Scissors

Step 1: To make the confetti cut strips into the folds of tissue paper then cut through the strips to make little square confettis. Make sure the size of your confetti is small enough to fit in your tubes.
Step 2: Put the confetti in the clear tubes and cap the lid so they are ready for your guests.


* You can add stickers and other items to decorate the tubes.

Enjoy!!
Hola Ático


Related Posts Plugin for WordPress, Blogger...